Top Menu

Archive | DIY

Best of Revere Ware Parts blog: Extreme Handle Repair

Today’s blast from the past is a reminder that anything can be fixed if you want to fix it bad enough.

This customer was faced with a sauce pan that required a handle type we don’t carry, and the handle spline was broken off to boot.

Sauce Pan Handle Project

This project involved putting a “Large” sauce pan handle on a “broken” handle stub of an early model Revere Ware 7” sauce pan.

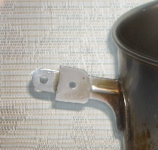
The Problem :

Before: This “early” model sauce pan had a broken handle bracket.

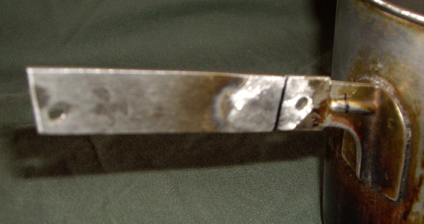
After: Welding  approx. 3” of  ¾” x.065” stainless steel strip to the handle .

This is the finished handle fix –

Note:  The original -early model- right tab was wider than ¾” and had to be ground away to match the ¾” wide stainless strip added to fit the ¾” wide handle niches.

Note:  The dimensional detail of the added piece was accomplished by creating a piece of  light cardboard that fit the handle recesses and then transferring that to a thing piece of sheet metal and from that, it was transferred to the stainless piece for the handle. .

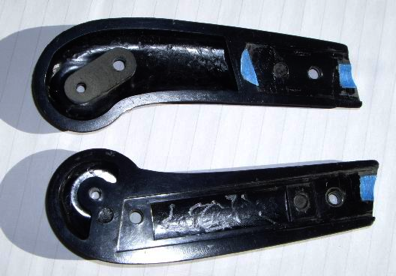
Left Side Detail:

Left Side A. The Left Side tab was basically unchanged.  However, we did weld the left tab to the new handle material for the purpose of strengthening the entire handle system.

Left Side B.   Blue Tape indicates the area of bakelight removal in the handle halves.

Note:  The black marker over the original strengthening rib where the handle is attached to the pan.  This rib interfered with the handle and therefore required some relieving of the handle with a Dremel tool to get clearance and allow the seam of the handle halves to mate up without a crack between them. (  See Blue Tape – Above  )

Left Side C.

Also the left side handle had to be relieved ( notice the semi-circle of blue tape ) and some of the handle cut away where the Tab was welded to the new handle material.

( See Blue Tape – Above  )

Right Side A.

The right side tab of the handle required the Tab be ground away so it was only ¾” wide to match both the new handle extension width and the bakelite handle niche.  Also bakelite had to be removed at the front of the handle where the strengthening rib interfered with the handle fitting flush to the tab.

( See Blue Tape — Above )

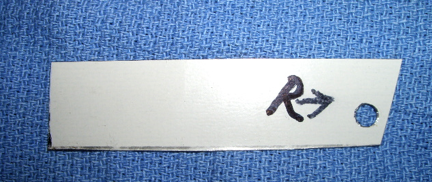
Right Side A.

This piece of .040” thick  x  ¾” wide  thick sheet metal was cut to fit the handle and used as a pattern for the shearing of the stainless piece that was .065″.

The stainless piece was then welded to the handle and ground flush.  Then the hole for the hanging ring was drilled after the handles were mounted and fitting well. The result is below.   ( The black line being the weld joint area. )

The Finished Pan….

The project was not all that involved and went quite smoothly.   Sheet metal snips, Dremel tool,  bench grinder, files, dial calipers, vice  and drill were the home shop tools involved.  I did take the stainless strip to a metal shop for shearing and welding.

0

Solving problems, advanced edition

I must say, the customers that are brave enough to purchase parts from a small independent website like ours seem to be made of heartier stock than their brethren that quietly retreat to the safety of Amazon.com for such purchases.

We know for a fact that those of you that purchase from us directly seem to be better at reading, as you rarely ever return items just because you didn’t fully read our product pages and ordered the wrong item.  On some products on Amazon.com, returns approach 15% of purchases; on our site we sit comfortably south of 1% of total orders being returned.  Even the characters that buy from us on eBay hardly ever return items, so this is definitely an Amazon phenomenon (phenomazon?).

But, there are some Amazon.com returns that are truly based on difficulty with our parts.  Granted, trying to replicate a line of replacement parts on a shoestring that was once developed by a huge corporation is bound to result in some imperfections.  But I give you our website customers credit, you seem to either figure it out or contact us for help (which we dutifully supply in droves) and rarely ever give up and just return the darn things, like your cohorts at Amazon are more likely than not to do if there is an issue.

So we’ve made some changes to try and engage with Amazon.com customers more; we now put stickers on every part with our Gmail address to make it easy for people to contact us for help, and we contact every customer who returns a product (that Amazon will allow us to in their infinite wisdom) to ask what went wrong.

And it turns out, we’ve been able to identify some small issues that are worth noting from al this.

Knobs that won’t screw on easily

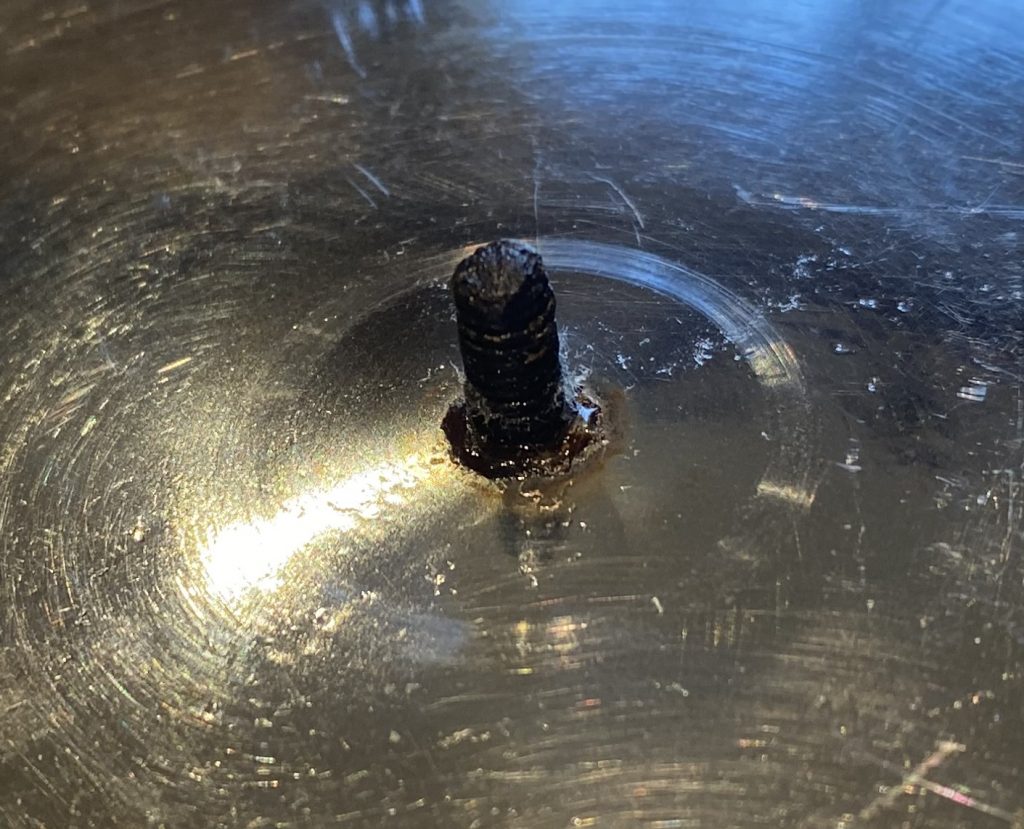
Sometimes, the lid knobs just don’t seem to want to screw on.  I suspect it is corrosion on the lid screws that is the ultimate culprit here.  When you see a screw that looks like this, you know there will be trouble.

I suspect the tolerance on our embedded nuts is a little tighter in our latest production run vs prior runs.

Here are some things to try if you are having hard time

  • Use some WD-40 or household lubricating oil
  • Scrub a rusty screw with a green Scotch-Brite pad to try and remove as much of the rust as possible.  A wire brush might also be helpful
  • Push the knob onto the screw to try and engage the threads
  • You can always remove the screw, drill a hole, and use a separate screw from the hardware store, as we detail here, if your screw is too far gone.

If it still doesn’t work, contact us for more help

POH-2 pot handle won’t fit flat against the pot or the holes don’t line up

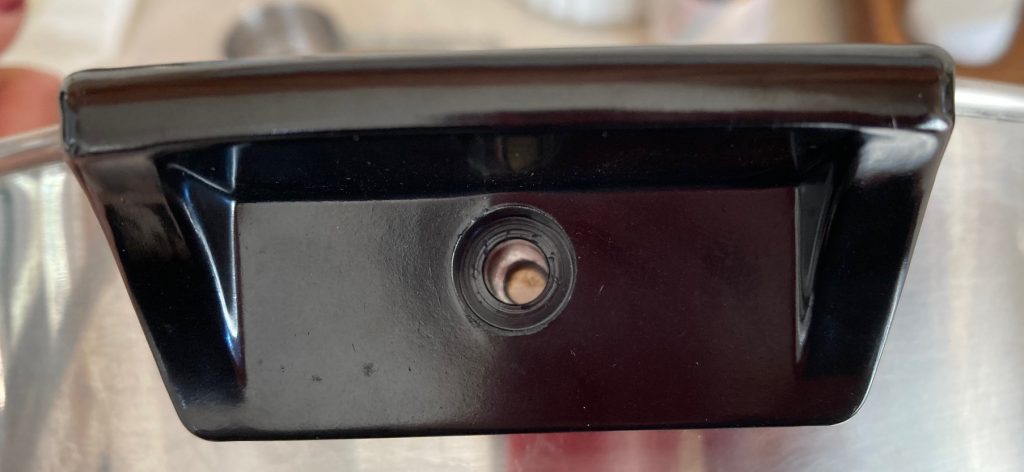
This one is another head scratcher.  We’ve had a few customers where the handle fits on just fine, but the hole in the handle isn’t line up with the hole in the bracket.

If this happens to you, you can sometimes get the screw to fit in just enough to screw down, and it holds fine.  Another solution is to nibble away at the inside hole of the Bakelite handle with a Dremel tool, or a round file, to provide extra room for the screw; usually you just need another 1/16th of an inch.

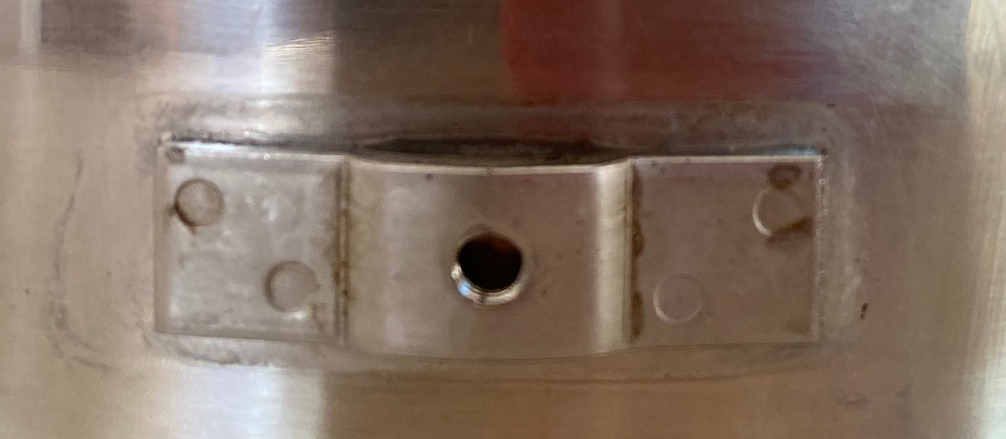
We’ve also had customers for whom the handle won’t fit all the way over the bracket. Here is the bracket of one such customer (who also had the hole won’t line up issue).

I measured several brackets from my test pots and they came out at 1.75″ x .5″ x 3/16″ (deep) the same exact measurements as the customers bracket.

In this case I sent her a replacement handle that worked, so it was probably just a little extra Bakelite on the inside of the handle where the bracket fits in that was preventing it from going all the way down. Please don’t hesitate to contact us if you have this problem.  If you are a DIY type person and don’t want to wait for another handle to try, use a Dremel tools to remove some of the Bakelite material from where the bracket fits to get it to seat all the way.

0

Fixing old Revere Ware sometimes requires some DIY

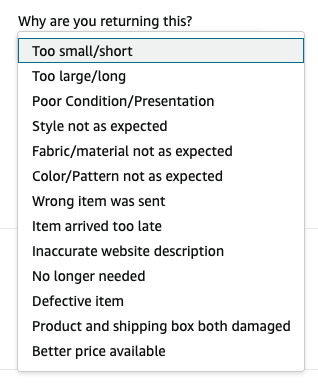
Amazon.com product returns have always been a black box.  People return items and often choose a category for the return for which they don’t have to pay anything to return it.

Defective item and Inaccurate website description seem to be favorites, and provide us with almost no information as to what went wrong.  We suspect that most returns are people simply not reading our product pages to make sure they get the right item, or buying things despite the warnings that it won’t work on anything but Revere Ware.  (In contrast, we have very very few returns from items sold on our website, and people almost always ask for help if they have a problem.  Even if they don’t, we often are able to avoid a return by providing suggestions along with the return info.)

Buried within the Amazon returns there are some people that have a problem they just need some help with.  We recently started putting stickers on all of our Amazon.com products that list our Gmail address to contact for help, and we’ve gotten a few responses and have been able to help some folks.

As much as today’s consumers like expect things to just work, those of us familiar with vintage things, know that it sometimes takes some time and effort to fix things.  Sometimes, you aren’t sure exactly what you have.

The part wasn’t defective.  It just didn’t fit my pot. I assumed it’s a Revere Ware pot; it certainly looks like it.  However, since the writing on the bottom of the pan is totally worn off, I could have made a bad assumption.

Sometimes you can’t find the right part and have to find an alternative.  Sometimes things break and you have to find a work around.  Sometimes you have to build something yourself.  And sometimes, even specially made replacement parts like ours don’t fit.

Pot handle that won’t fit on one side

Take this example from a very nice Amazon customer that contacted us for some help.  He ordered our single screw pot handles, and one side fit just fine, but on the other, the hole in the handle didn’t line up with the screw hole in the bracket.

He tried the working handle on that side and it also didn’t line up.  It seems the bracket on the pot is different between the two sides.  This leads me to speculate on a couple of things; whether our replacement handles are less flexible in situations like these than OEM Revere Ware ones, or perhaps  these situations happened in the factory on occasion and they just accommodated a slightly different bracket by modifying a Bakelite handle to fit.

The latter is what I suggested to the customer that he try, and widening the hole in the Bakelite just a bit allowed him to get the screw in and all is well.

I decided to get out my Dremel tool to demonstrate some modifications for a situation like this.  You can either widen the screw hole, as the customer did, or enlarge the area where the bracket fits, so the handle can slide down a bit.

The one one the left has had the screw hole widened upward using a round Dremel bit, but a round file will work just as well.  The one on the right I ground down some of the bottom ledge of the recessed area where the metal bracket on the pot sits, so that the handle can slide up a bit, thus centering the hole in the Bakelite on the hole in the bracket.  The nice thing about both of these modifications is that they are at the back of the handle, and won’t show, and / or will be hidden by the screw from the front.

As a reminder, whenever sanding, filing, or grinding Bakelite, like other materials that will generate a fine particulate dust, always wear a safety mask, preferably an N95 type. We’ve all got some of those around these days.

Knobs that won’t screw on

Another situation we’ve run into a few times recently is when our knobs won’t screw on customers Revere Ware lids.  While we do see the rare defective nut insert that is missing threads entirely, this isn’t very common.  I’ve tested our knobs on quite a few of my lids lately and haven’t yet found a knob or a lid that won’t work together.  But I have found some that are a bit difficult to screw on.  This can be caused by rust developing on the threads, making them slightly larger.  Because water can often get under the Revere Ware lid knobs and that area doesn’t dry out easily, rust can develop.  Yes, even stainless steel can rust given enough opportunity.  Rust can also develop when you have dissimilar materials touching, like stainless steel (screw) and aluminum (nut insert) together.

To get past this, you can try “sanding” the rust off with  some WD-40 and a green Scotch Brite pad.  Sometimes screwing the knob on a little, then backing it off, and screwing it on some more, repeatedly, can get it on.  One customer sent us the knob that didn’t work for him and it worked fine for me on all of my test lids.  The point is that usually it isn’t the knob that is the problem.

In conclusion

One point of all this is to give some perspective.  Things don’t always work the way they should but often a solution can be found if you just ask, or do a little web searching.  We are always willing to help solve your problems, whether you buy from us or not.


2

When replacement isn’t an option – restoring Bakelite

We sell quite a few replacement Bakelite handles and what now now, but there are some parts that don’t have enough demand for us to produce, given the minimum quantity we must order for each part we make.

Assuming it isn’t cracked, restoring an old, faded Bakelite part is the only option.  There used to be a restoration service (that was expensive) that was an option before we started producing parts, that involved sanding the Bakelite with progressively finer sandpapers.

But we just came across a guide that makes it sound much more simple.

Step 1

Wipe down the handle with warm soapy water to wash away as much of the grime as possible.

Step 2

Rinse with warm water and dry with a clean cloth.

Step 3

Buff away deep scratches gently with fine gauge sandpaper.

Step 4

Apply liquid metal polish in a tight circular motion with a clean cloth. Rub with as much pressure as needed to polish away the accumulation of stains and dirt. Wait for the polish to haze over.

Step 5

Rub with a clean, dry cloth to remove the polish.

In terms of what fine gauge sandpaper is required, I am guessing perhaps 200, 400, or 600 grit would be possible options.


0

Restoring Bakelite when replacement isn’t an option

We sell a good number of replacement Bakelite parts, but it just isn’t economical for us to produce everything.

When replacement isn’t an option, you can try to restore the Bakelite part.  Here is a good tutorial on an old Bakelite radio.

In short, clean the piece, rub it thoroughly with 1000 grit steel wood, and then polish with Brasso.  I’ve also heard that Simichrome polish works well and might have a little bit of chemical reaction with the Bakelite that helps the restoration.

2

Finding old-style 2-screw pan handles

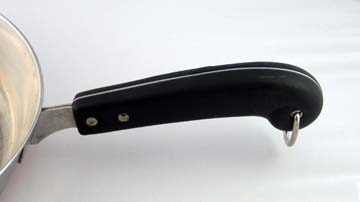
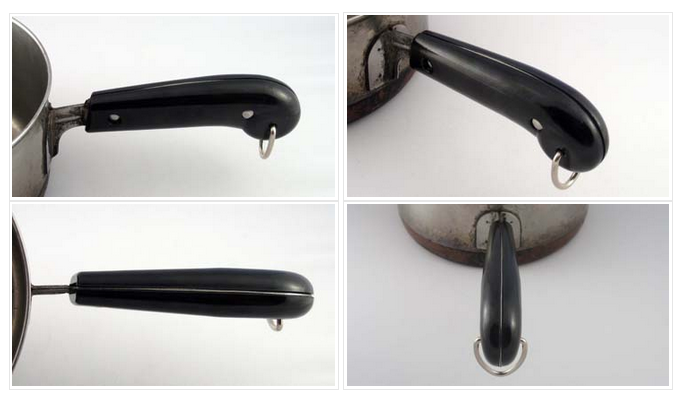
Our 2-screw handles fit Revere Ware cookware made since the early 1940’s.  However, from 1939 to the early 1940’s Revere Ware briefly used a type of handle that was somewhat different, but looked very similar.  These handles had 2 screw holes near the pan side of the handle, and another screw that went through the hold where the hanging hook goes.  They look like this:

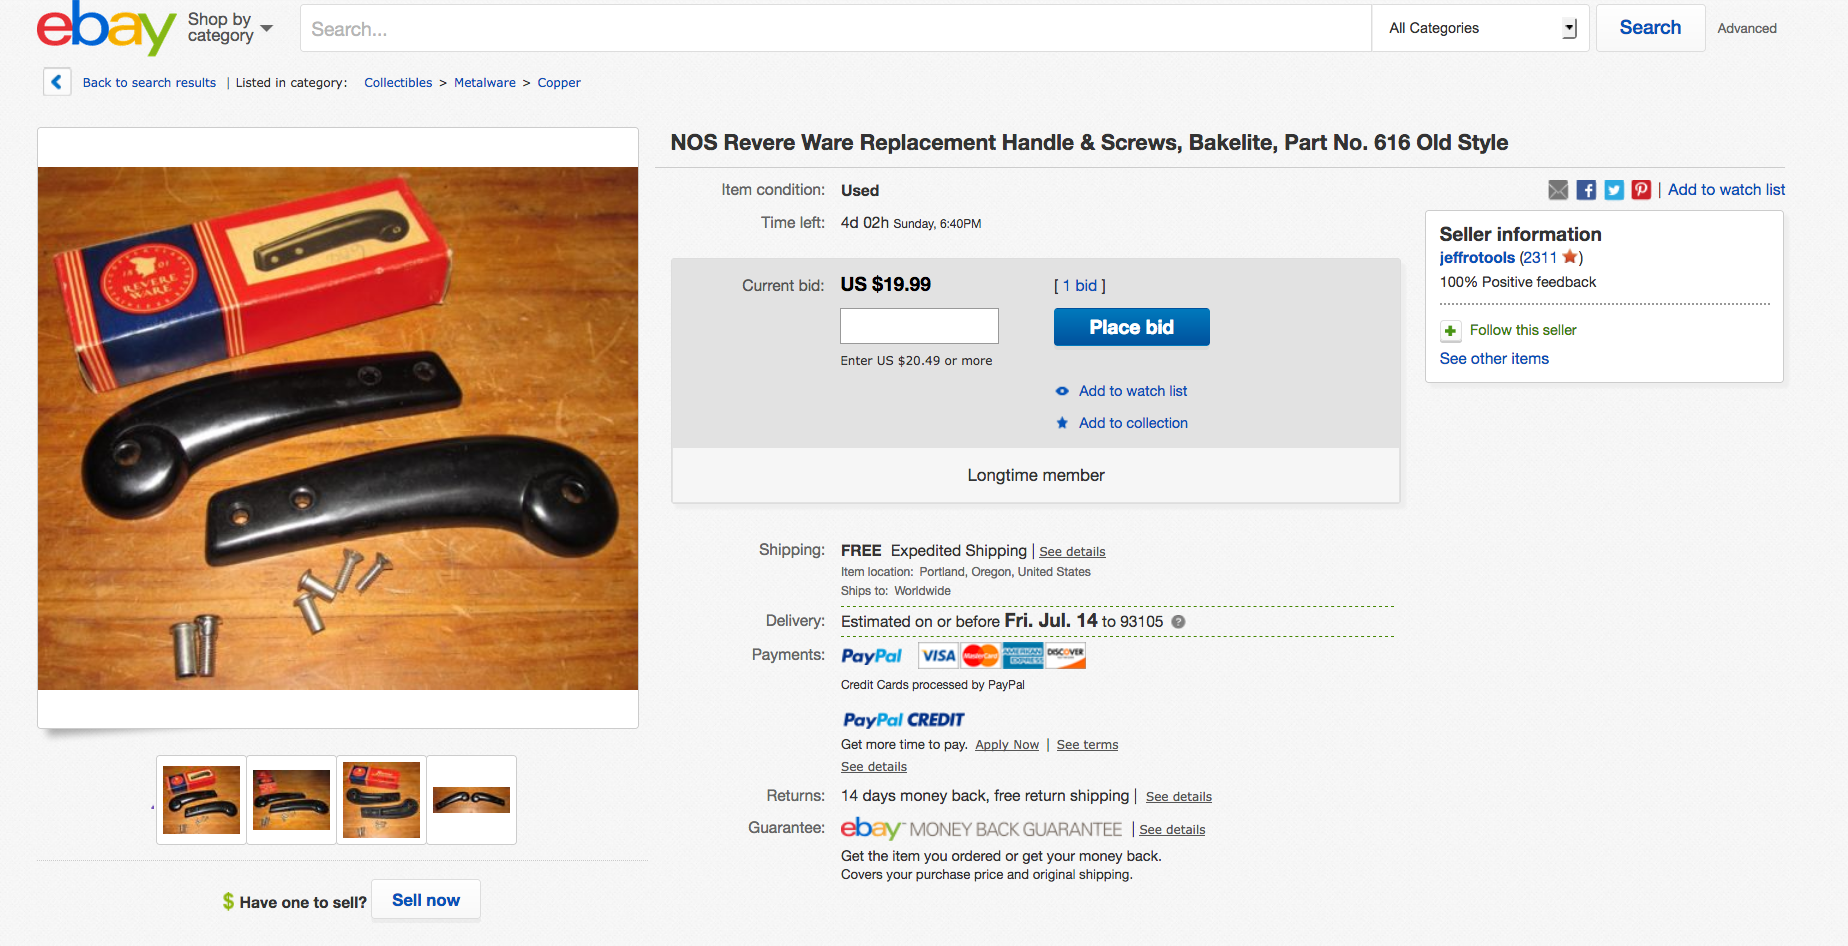
Unfortunately, because of the limited number of pieces that have this type of handle, we don’t sell a replacement.  However, from time to time (like the ones above) they do appear on eBay.

The key is to save a search on eBay like “Revere Ware handle) such that it will email you new matches.

For the less patient, we have a guide to adapting our handles to this style of cookware.

For the more ambitions, you could grind down the metal spline to get a perfect fit.


0

Fix a warped skillet?

We’ve tried on several occasions to fix a warped skillet, with little success.  However, we recently came across an article that talked about heating and pounding out a warped pan.

The technique is to heat them up, put a 2×4 long enough to go from edge to edge of the pan on to the crowned side, and beat the heck out of it — all over it’s entire length, while revolving it so the entire pan surface gets its share of whacking.

If the pan is warped so the crown is on the outside, you have to rest the lip of the pan on a flat surface, so that the handle doesn’t touch the surface; a stair step is good.  If the pan is warped so the crown is inside, you have to cut the 2×4 to fit — as closely as you can but without making a big deal out of it.

Just keep reheating the pan and keep on whacking ’til you get bored.  The flattening will hold longer if you do both the inside and outside, but you can get most of the goodness if you only flattened the crowned side.

If anyone tries this, please let us know if it works.

7

When you can’t find a replacement part – buy a donor

We often get queries for replacement parts not in our catalog.  Unfortunately, it isn’t economical for us to supply every type of part regardless of the amount of demand out there for it.  One option, is to search eBay for new old stock replacement parts.

When that doesn’t work, it isn’t necessarily the end.  Given that there is a very rich marketplace on eBay for Revere Ware cookware, you can very likely find the same piece you are looking for a part for, that is complete, and use it as a donor for the parts you need.

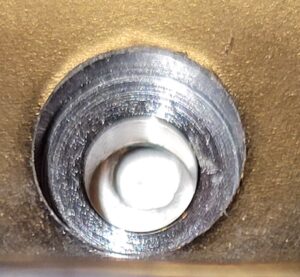
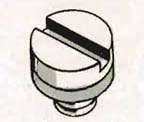
One example of a part that is critical and can no longer be purchased anywhere is the over pressure plug for the vintage pressure cooker.

While this may look like a simple screw, it is not.  IT has a hole in the center filled with solder that will blow out at high pressure.  Once the over pressure plug has been blown out, it must be replaced.

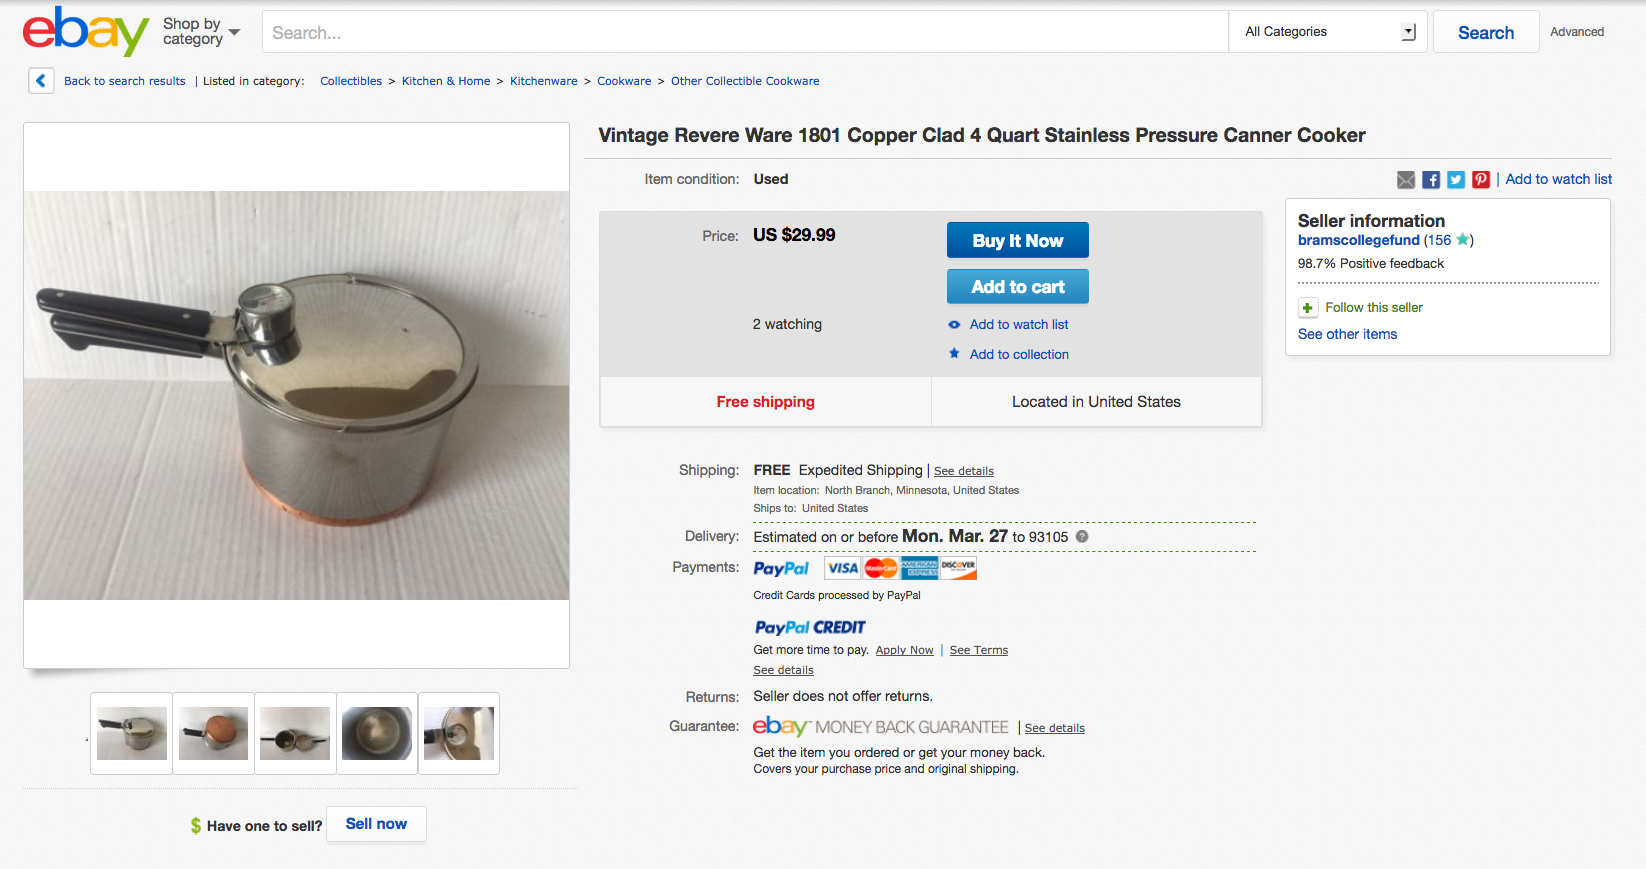
eBay typically has quite a few listings for the vintage pressure cooker.  For example, here is one for $30 shipped.

If you are attached to your vintage piece (as many of us are) this probably isn’t too much to pay to get your pressure cooker functional again, and you’ll get some other extra parts to boot.

So, the next time you can’t find a replacement part, consider buying a used piece as a parts donor.


0

3D printing a new tea kettle trigger

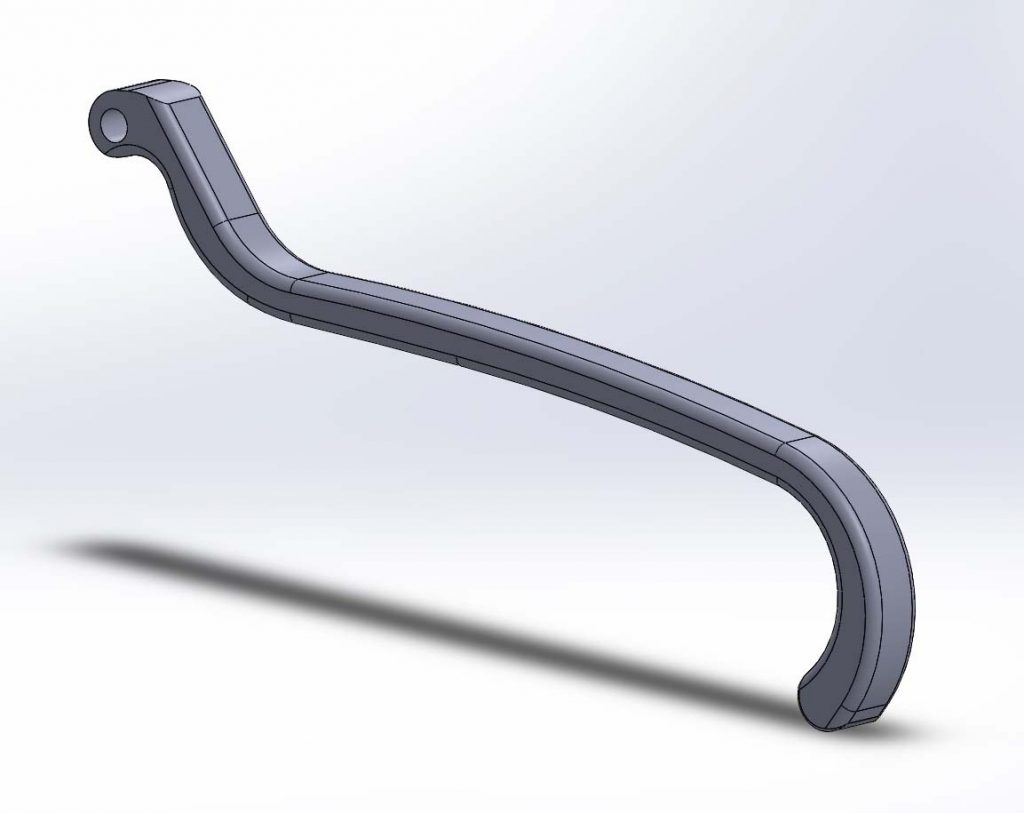
We’ve completed our first 3D printable design – a trigger for the larger 3 1/2 (or so) quart Revere Ware tea kettle.

trigger_rendering

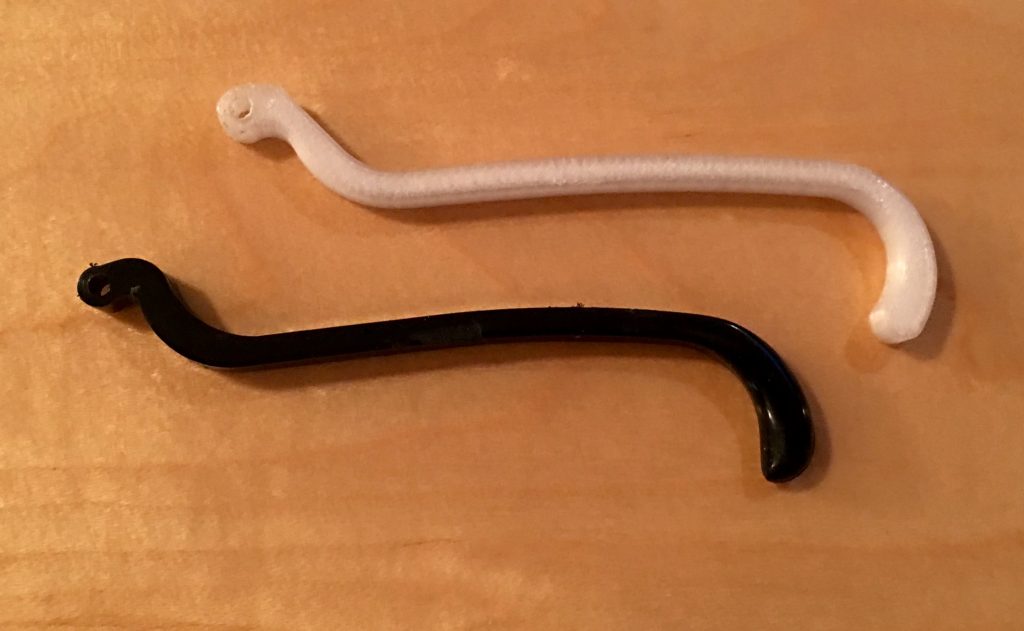
Here are the old and new trigger side-by-side:

old_new_trigger

We gave the new trigger a more curved end as we felt that the original allowed the finger to slip off too easily.

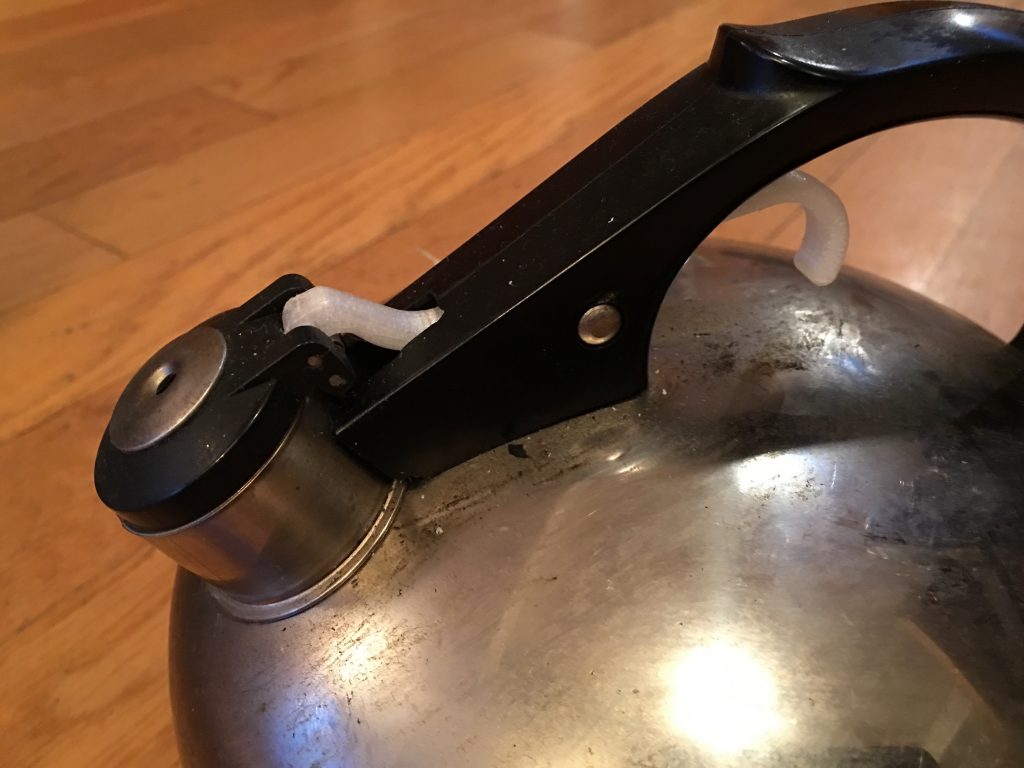
The only material available for our printer that matches or exceeds the temperature resistance of Bakelite is called Z-GLASS and is semi-transparent.  While the trigger won’t win any beauty contests (it is a bit of a rough finish due to the nature of 3D printing) it is quite functional.

Here it is on a kettle:

trigger_on_kettle

If you have a 3D printer that can print to a material that has a deformation / deflection / softening temperature (the point at which it will irreparably bend) greater than 350 degrees F, you can print these yourself.  Here are the Solidworks and STL files.

If you would like to get one of these triggers, please contact us.

Update: Unfortunately, despite the temperature rating of the material we used, the trigger started softening up pretty quickly when we tried it out on the stove.  We are still looking for a material that can be 3D printed and will withstand the temperature.


2

3D printing low-quantity replacement parts

zortrax-m2003
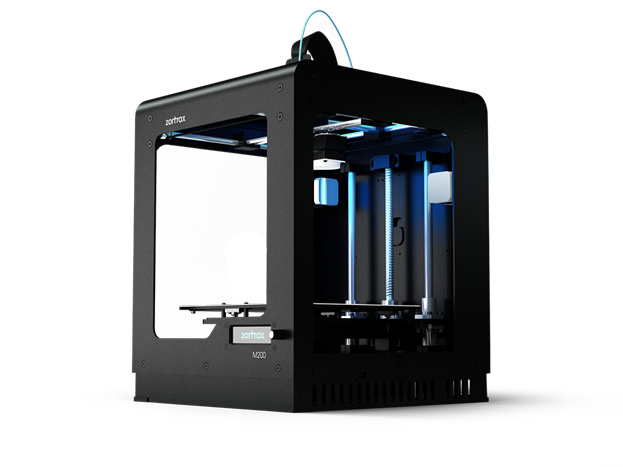
We receive a lot of requests for parts that we don’t carry because they are too low volume to justify the cost of making molds and of minimum order quantities. In short, we’d lose money on them.

However, we recently purchased a 3D printer for another project and are intrigued with the idea of being able to do small runs of low-quantity parts, to make some of the rarer pieces available again.  There is one material in particular that is a good fit as it has a melting point that is high enough for normal stovetop cooking (and is above that of Bakelite).

We’ve love to offer a download library of parts as well so people can print them themselves if they wish.

While our own rudimentary 3D design skills might get the job done, there are probably much more qualified people out there.

If you are as passionate about Revere Ware as we are, have 3D design skills, and want to contribute to this effort, please contact us.

0